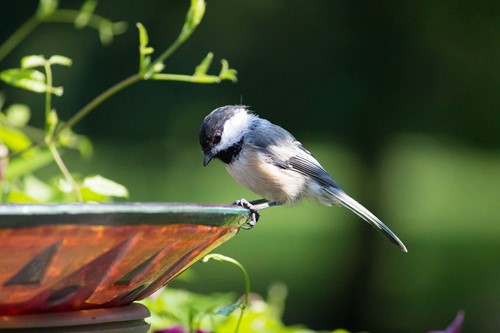
Bird baths are a staple of garden decor that come with the added benefit of attracting local wildlife to your yard. One of the other great things about bird baths is how easy it is to craft them out of everyday items. While you can purchase pre-made bird baths at home and garden stores, choosing to DIY will reward you with a unique and often far less expensive piece of decor. Because bird baths are so versatile, you can also combine them with other garden essentials like containers for plants. Here we’ll go over how to build your own combination flower planter and bird bath for your outdoor space.
For this design we recommend using urn-style planters made of hard plastic. Here’s everything you’ll need:
17-inch urn
12-inch urn
10-inch terra cotta or ceramic saucer
Outdoor-safe craft paint (optional)
Flowers/plants
Potting mix
Cordless drill
This project gives you a lot of freedom for plant choice. For low maintenance bright colors, opt for geraniums, pansies and anemone. If you plan to have your bird bath planter in a sunny spot, succulents also make a brilliant choice for plants as they will require practically no maintenance.
To begin, drill several holes in the bottom of the larger urn. This will add essential drainage for the plants in the container.
If you want to customize or change the color of your containers, paint them with an even coat of craft paint. You can do this with any large paint brush or small roller. While it might tempt you to use spray paint, craft paint is safer for wildlife.
Once the paint is dry, take the smaller urn and flip it upside down. Place it into the larger urn.
The urn should be heavy enough to keep itself in place, but if you want some extra security, you can add a layer of rocks or gravel to weigh it down. Then, add potting mix into the larger urn.
Take your plants and carefully add them into the soil one by one. You may need to dig out a hole for each before placing it. Make sure you leave enough room between plants for them to grow.
Take the terracotta or ceramic saucer and place it on top of the upside-down urn. Once again it is likely heavy enough to stay in place, but you can use waterproof glue in a ring around the bottom of the saucer to stick it to the urn.
Fill the saucer with water. For added visual interest and more places for birds to perch, you can add one or more large river stones.
Now you have a beautiful custom bird bath that doubles as a planter. As the plants grow, it will appear more lush and may even help attract hummingbirds, bees, butterflies and other pollinators to come take a drink. Swap in new plants seasonally or watch them flourish all year long while enjoying the benefits of your DIY work.

Ted draws energy and joy from building synergetic relationships with his Clients. Ted's nature is graciously gregarious and persevering; he's honest; and he's been dedicated to a substantial list of clientele throughout his 25 years in the hospitality business and seven years as a REALTOR. His passion is creating a sincere, successful relationship with people.
Ted grew up in a family of Realtors in central Indiana, earned a degree in economics and philosophy from the University of Notre Dame, and jumped into all aspects of the restaurant business. His ensuing hospitality career path eventually led him into the Event Management Sales & Service role in hotels and quickly guided him to Los Angeles, San Francisco, and finally to a luxury resort in the Napa Valley, where he, his husband, and their dog have resided for 16 years now.
The irony is not lost on Ted that his ‘growth’ journey has culminated in“living happily ever after” in an agricultural area with a small-town feel and sense of community strikingly reminiscent of his youth…and as a REALTOR nonetheless!